(Notes based mainly on the content from Ben Piper’s excellent pluralsight course)
Usually goes without saying, but especially when configuring VPC’s and hosts inside them on AWS - default is usually not the way to go. The course sort of reiterated the importance of designing the components (ENI, subnet etc) then adding them together based on your design, rather than clicking through the interface like you might in a lab.
Quick notes:
- A VPC can actually have more than one CIDR assigned to it.
- Implied router and a route table are essentially the same thing. All traffic traverses an implied router.
- If we assign an EIP we can keep it indefinitely, if one is assigned at boot we might lose it on reboot.
- You can ping the implied router in a VPC on the first IP in the subnet (or use the linux ‘route’ command to get the IP).
- There is NAT implemented between the implied router and the Internet gateway.
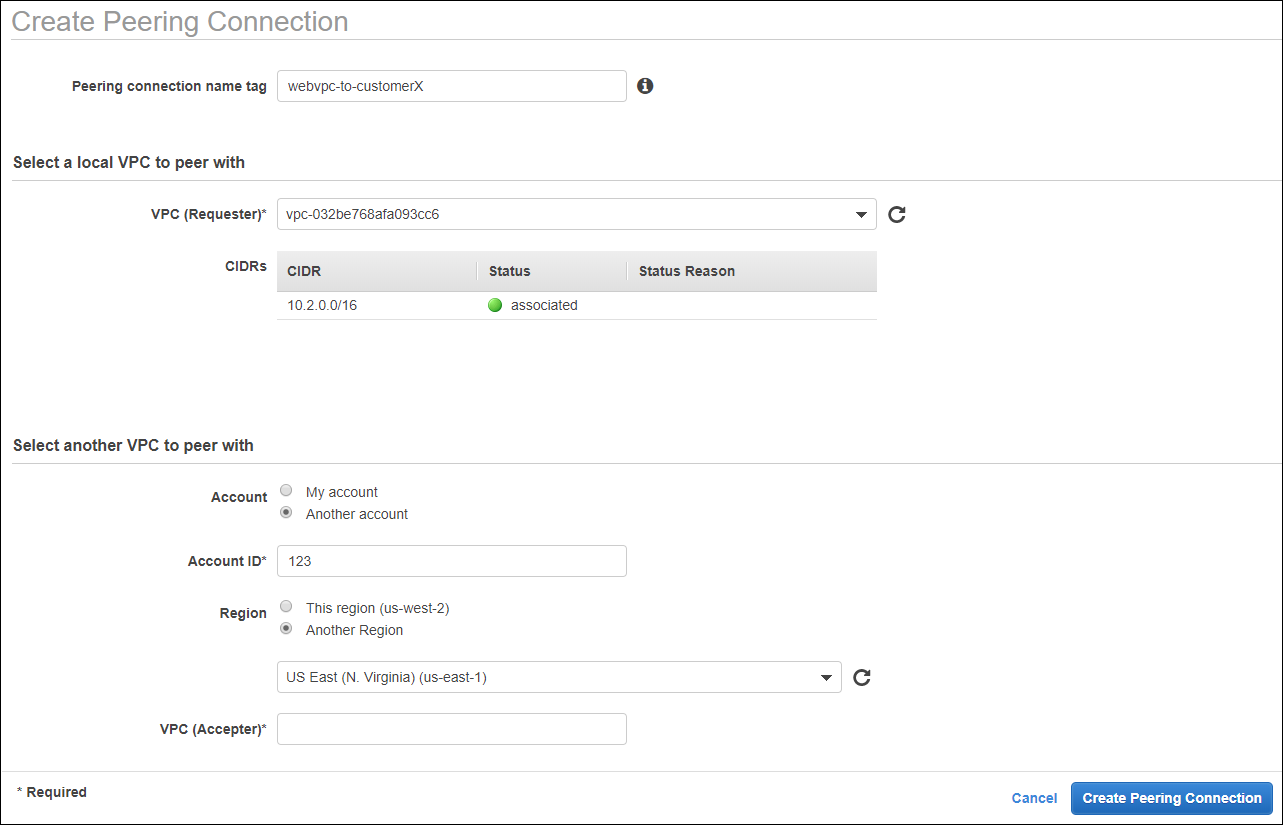
VPC Peering
Adding peering is actually really simple, but we also need to update the route tables to point instances at the VPC peering link for the remote services. Also consider the security group configurations on both sides. One note is that the “target” field doesn’t always seem to do a great job of enumerating the potential targets, it took a few seconds after I type “pcx” for it to find the peering connection id created.

You need to go in and “accept” the VPC peering connection. It feels weird in the lab, but it makes sense when you consider that there’s a use case to peer to other VPC’s as well.
Peering limitations:
- You can do cross region, but IPv6 is not supported.
- You can’t peer overlapping IP CIDR clocks.
- An instance in one VPC can’t use the peering connection and then the Internet Gateway of the remote VPC.
- Full list: Unsupported VPC Peering Configurations
NAT
NAT instance can be used to allow outbound Internet access for otherwise non Internet connected subnets.
Use “community AMIs” > search for “amzn-ami-vpc-nat-“ for a pre-configured AMI that has the NAT configuration baked in (we don’t have to configure the machine).
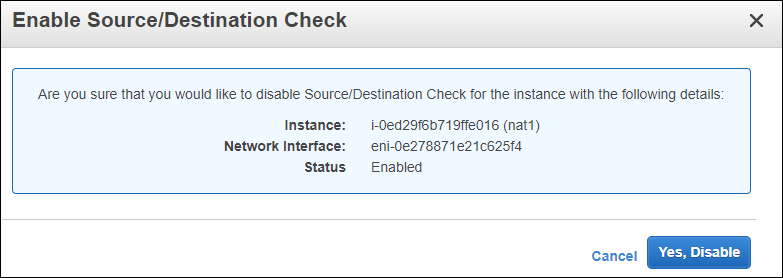
When the machine comes up, don’t forget to disable the source/destination check that would otherwise prohibit the machine forwarding on things that don’t belong to it. (You do this from actions > source/destination ip check) in the EC2 console for the machine.
Hang on, how come we aren’t just using a Nat Gateway?… Cost. Depending on the needs a NAT instance might be a third of the cost. It doesn’t scale as well and it’s not highly available but it might be perfect for a lot of use cases. Especially the case where you don’t want much Internet access for the machines in a VPC (and you also don’t want them connected to the internet directly) - they might just use it for package management or patching. Also, you can potentially use your NAT instance as a bastion, that’s neat as well (just remember to use strong IP whitelist controls).
Outside of all that, the process for configuring it with subnets etc is similar.
Transit VPC
Lets you connect multiple VPC’s and sites together. We can minimize the number of VPN connections. We can also allow transitive routing (unlike peering).
You use some sort of virtual router instance. Cisco is the one in the example (CSR 1000V), but others are available.
As you’re setting up the VPC connection side in AWS the console provides you with a config file for the router (neat!)
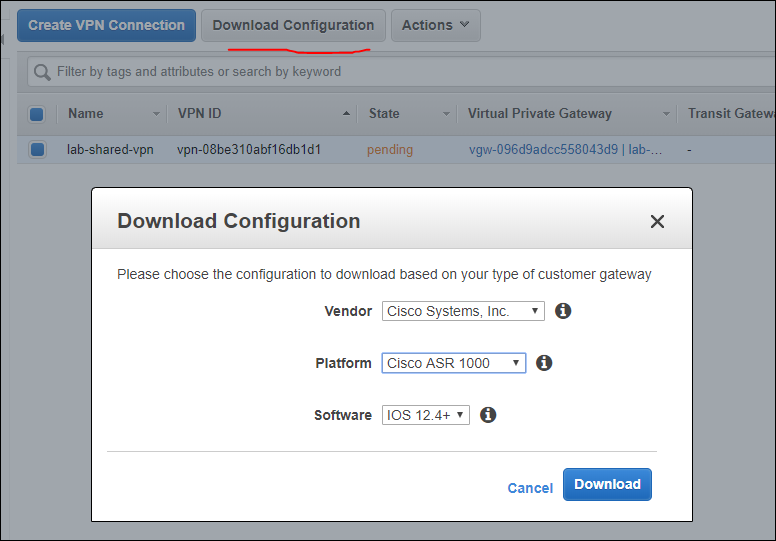
It’s not done though, don’t forget to update the file with your IP addresses.
! You may need to populate these values throughout the config based on your setup:
! <interface_name/private_IP_on_outside_interface> - External interface of the CSR
Transit VPC should be part of your design plan from the start.
Transit VPC was a 2016 technology, transit Gateway is the managed version that has been offered since 2018. Amazon actually offer a tool to assist with migration tgw-migrator.py its available here
Monitoring
VPC flow logs are the main thing. Each 5 tuple is a ‘flow’ (src & dest ip and port as well as protocol). We can store them in Cloudwatch Logs or a S3 bucket. You can log for just a subnet or ENI. It won’t capture the AWS DNS, DHCP, NLB or the 169.254.169.x addresses.
Important to remember that its not real time monitoring. Its bundled into roughly 10 minute writes by default but 1 minute is also available.
Saving the logs to cloudwatch logs is expensive compared to S3 (at least double). Part of the reason probably relates to all the features you get. There’s powerful search and filtering built in. An alternate to the cloud watch interface is AWS Athena.
IPv6
IPv6 is somewhat a work in progress for cloud services. You can (weirdly) only configure IPv6 in working IPv4 VPC or subnet. AWS typically assigns a /56, you then assign /64’s to your subnets; you can bring your own IPv6 address range though. Makes it a little difficult to know IPv6 ranges ahead of time for planning.
IPv6 is a place that administrators could easily accidentally open an instance to the Internet. Be careful. (::/0). Don’t forget, you test IPv6 addresses in a browser by surrounding them with [], like [2600:1f18:6135:4000::10].
Limitations are captured here