BLUF:
(Bottom line(s) up front because you probably don’t really need this post at all; the setup of code ready containers is really simple. The post just captures some of the quirks i ran into)
- [1] Download Code Ready Containers from Redhat. Start here: https://developers.redhat.com/products/codeready-containers/overview
- [2] Extract the .zip file to a temporary location.
- [3] Run the installer that is extracted.
- [4] Run “crc.exe setup”.
- [5] Run “crc start”
- It’s possible that you’ll see errors like
"Error waiting for apiserver: Temporary error: ssh command error:". In my case, this was attributed to the service taking longer than expected to be ready, so when the oc commands were tried, they failed. The resolution was to upgrade the storage in the device to SSD (I was using an old host; plenty of RAM, hopeless disk)
Background:
There are three main deployment methods for Openshift:
- [1] Installer provisioned. Could be AWS/Azure/GCP/Openstack; the main point is that the OpenShift installer creates the infrastructure and bootstrap node.
- [2] User-provisioned. Similar, it could be AWS/Azure/GCP/RHOSP/VSphere/IBM/ or Bare metal; the main point is though - you’re configuring everything yourself (compared to “installer provisioned”). This is obviously More difficult, but is also more granular and open to very specific configuration where needed.
I’d call those two the production level deployment approaches.
To get started fast, but still be able to learn the same concepts right up to the sharper points you want to start with:
- [3] Code ready containers - your laptop/desktop deployment. It’s the easiest way to get an instance up. It’s run in a single virtual machine, the hypervisor technology depends on the OS you’re using. It’s ephemeral. And not all “operators” (which we’ll look into as we learn more) are enabled by default - this is ok, it saves you resources and you can enable what you need when you need it. The only extra note before we dive in is that there is no real openshift’ish upgrade path to new versions; you hack out the old and deploy the new - but it’s ephemeral anyway.
This post is a very quick capture of the installation of code ready containers on Windows. The only aims are to 1) provide others an idea what to expect & 2) remind me the same.
Before we jump in, consider this the minimum you should have available on the host machine:
- 4 CPUs
- 9GB memory.
- 35GB of storage.
- (Strong recommend) SSD storage.
Steps:
-
[1] Download Code Ready Containers from Redhat. Start here: https://developers.redhat.com/products/codeready-containers/overview and click the big “Install OpenShift on your laptop” button. You’ll need to either create a redhat account or log in with one you have (it’s free). Right next to the download button there will be a “pull secret” that you’ll need to save for later (when starting the environment). I recommend saving the file so you don’t lose it.
-
[2] Extract the .zip file to a temporary location.
-
[3] Run the installer that is extracted. If it has sufficient rights it is going to add the path to the crc.exe file to your system path so that command like “crc {something}” will work from your command prompt.
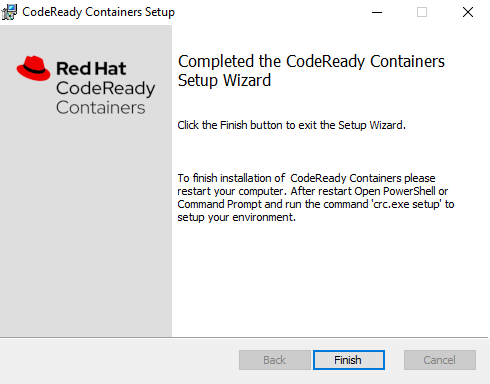
Some notes on the “install” step: Hyper-V will be installed if it is not already. You’ll be asked to reboot if Hyper-V is installed as part of the CRC installation.It’s easy to miss, but notice that the final installation box is giving hints on what to do next.
- [4] Run “crc.exe setup”. It will check the configuration and make adjustments as necessary.
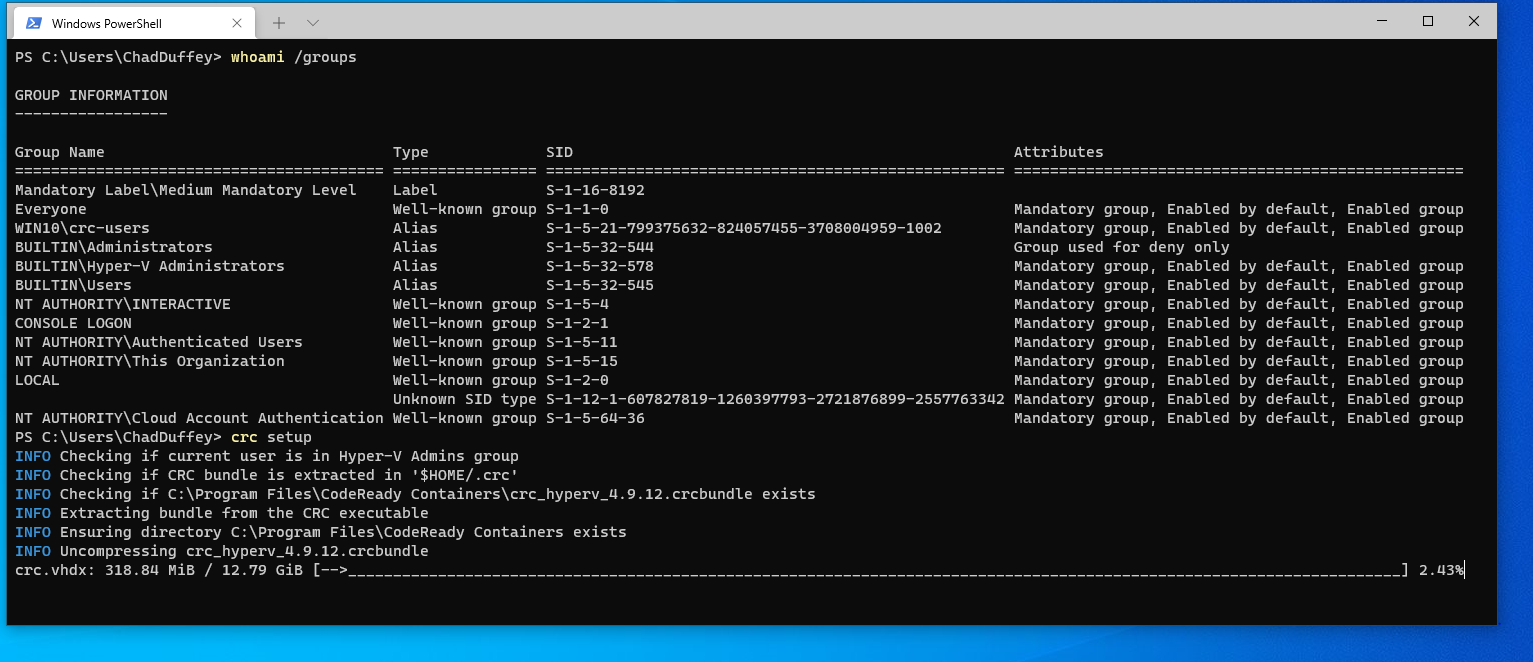
- You’ll also be asked to reboot if the user you are installing with is not a member of the “Hyper-V Administrators group”. The reboot will help with getting the new group membership into the users token. THe screenshot above includes a view of the token showing that the current user is part of the Hyper-V Administrators group and for that reason the check in the crc setup comand will pass.
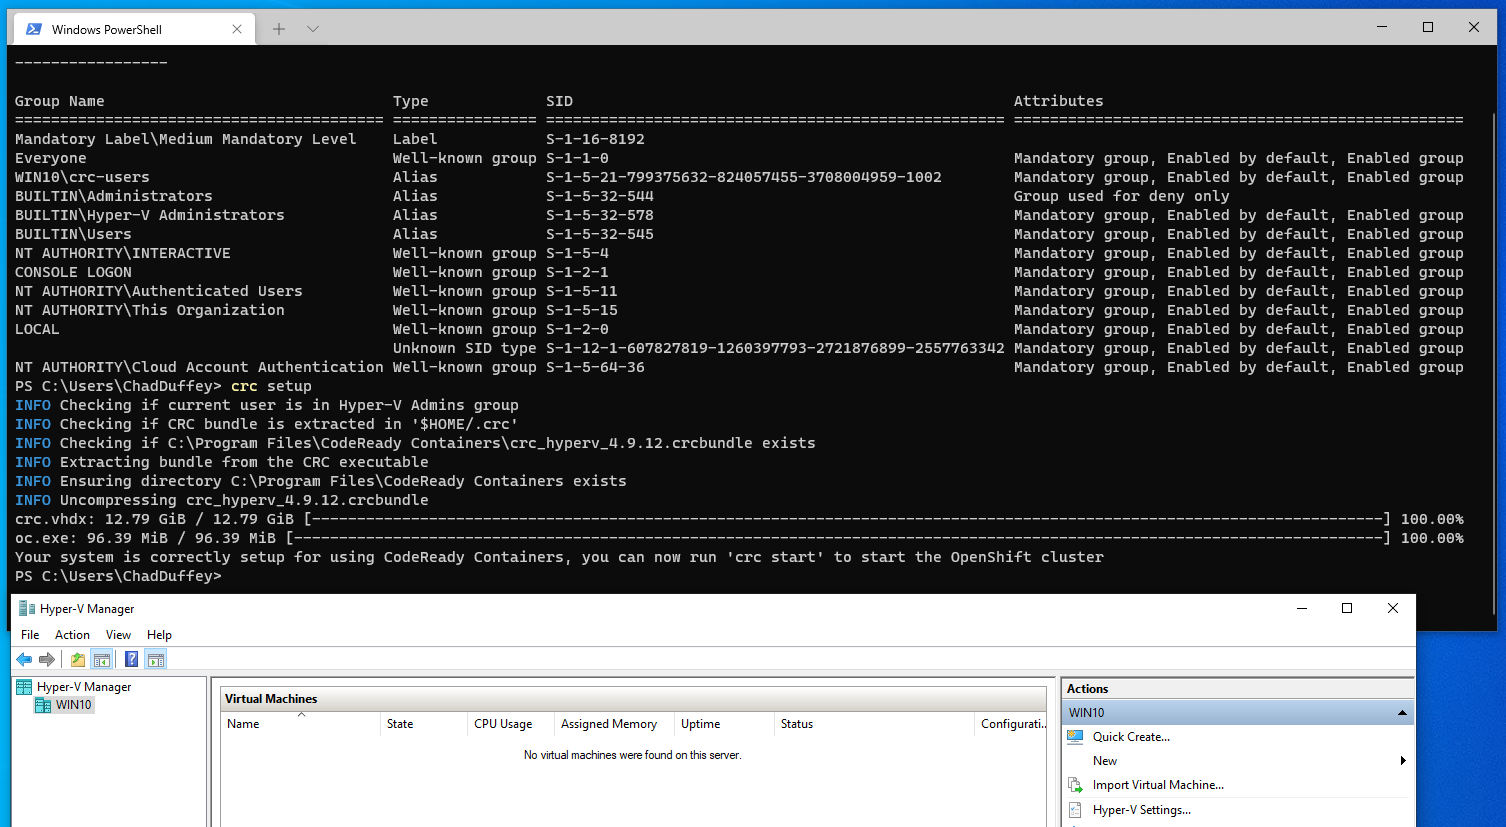
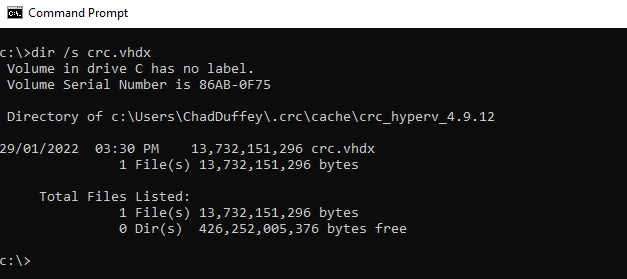
- The crc setup step will download the Hyper-V .vhdx file for the Code Ready Containers instance. Interestingly, this step will not import the .vhdx into Hyper-V; it just makes sure it’s available on disk.
- [5] Run “crc start”. That’ll do the final checks, import the pull secret, import the VM and get the environment running. The pull secret should have been supplied to you when downloading the Cloud Ready Containers installer.
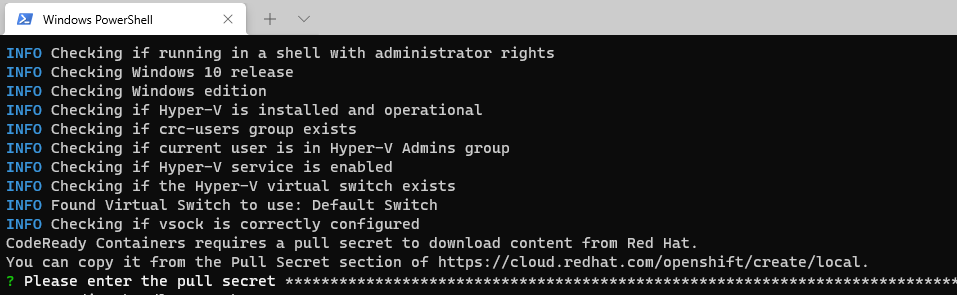
- This is where things went off the rails a little for me. I was getting a few errors, but the first was related to DNS. The Windows host was a brand new machine so i was a little surprised:
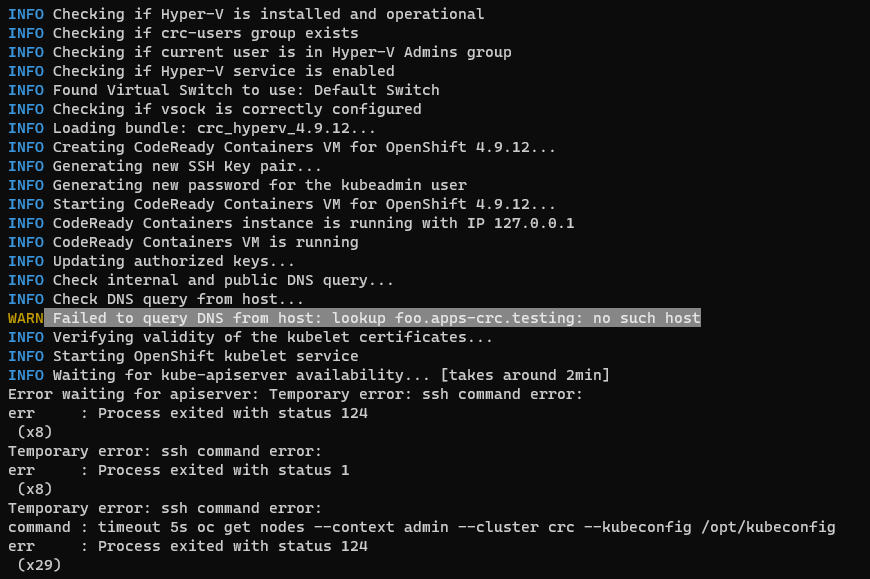
- The first error, related to name resolution was fixed by adding the DNS name to my hosts file to resolve to 127.0.0.1. Unfortunately though, the second error(s) remained even after clearing that first bump in the road.
- Some GitHub issues and posts online mentioned that it was not supported to have things like nested Virtualization or Windows Subsystem for Linux (WSL). Disappointing, but i install WSL as a default, so it’s worth a shot…
- The change did not immediately work.
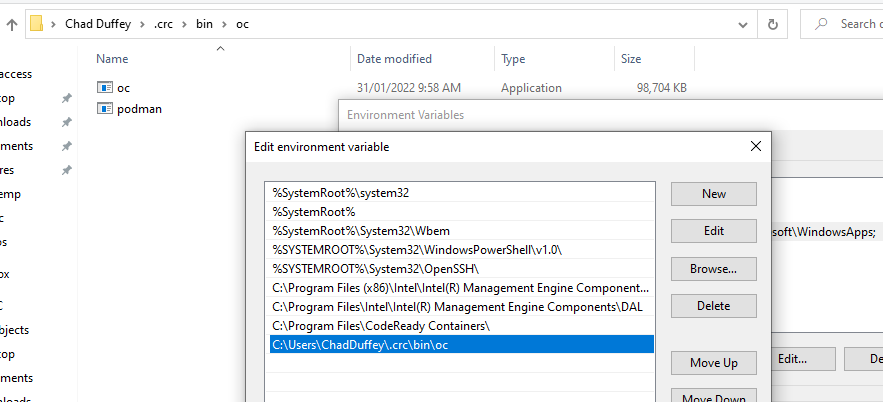
- After messing around for a minute i tried the “oc.exe” command manually and realized that it was failing due to a path error. I’ve updated my system path to include “c:\users\username.crc\bin\oc”.
- This also “failed”.
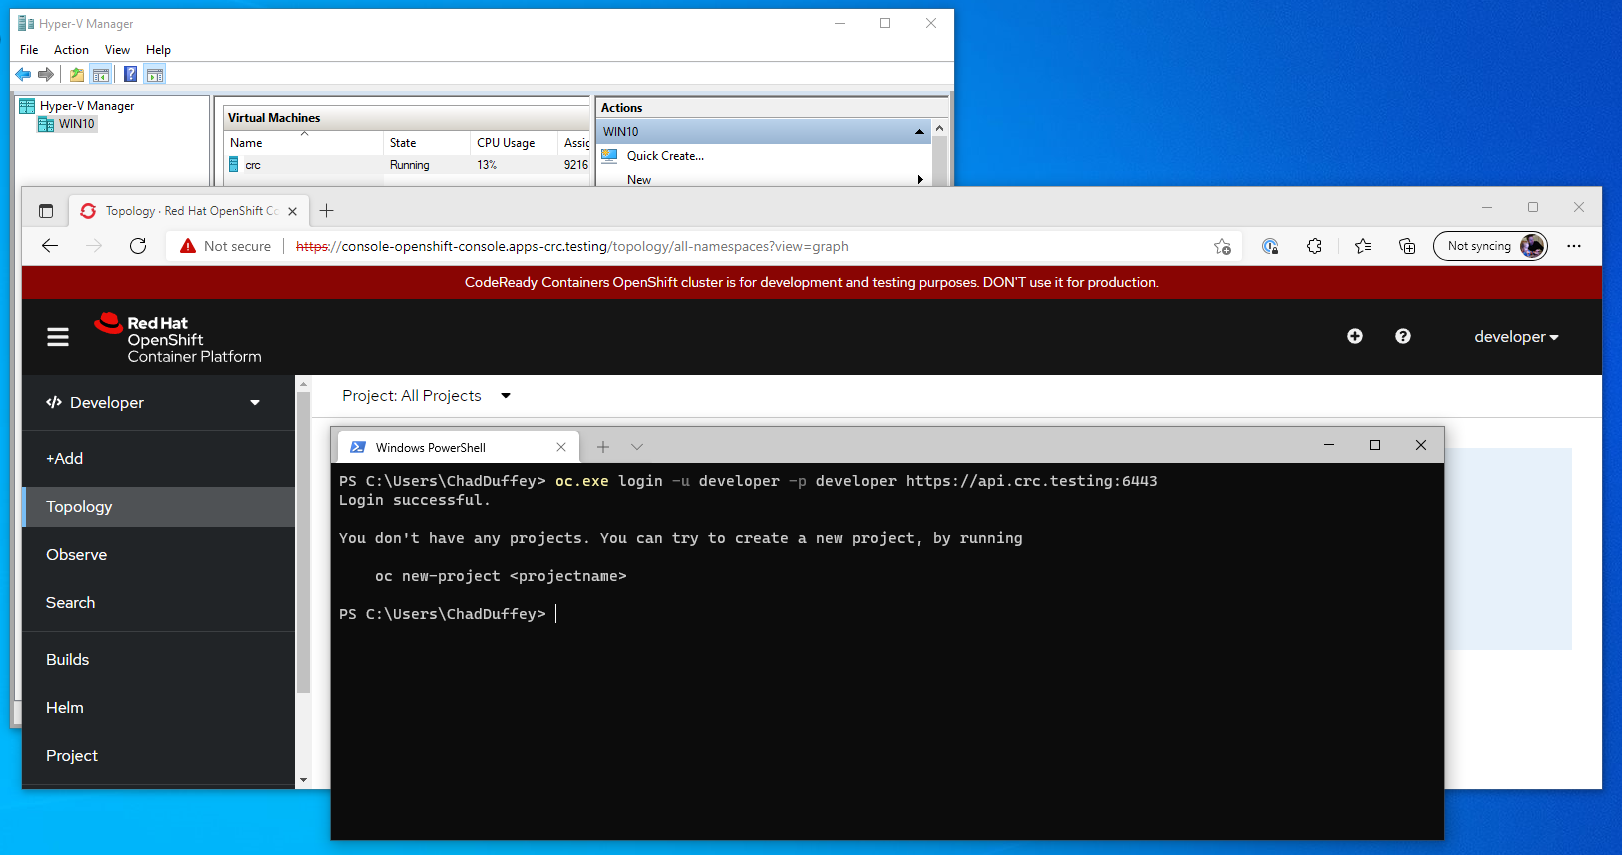
- However, shortly after i realized that if i leave the service to continue starting for about 10 minutes after the error messages, the service starts successfully. I realized this using the tray icon to navigate to the web portal, and then confirmed it using “oc login -u developer -p developer https://api.crc.testing:6443”
- You can see the environment up and running below:
So that’s frustrating, it’s possible that all of my trouble was simply not waiting long enough. If that’s true i’d argue that maybe the error message is thrown too early, or on the wrong conditions on Windows, but i should quickly test. I’m going to add back all the things I took away to be sure I was in a supported state: Windows Subsystem for Linux (WSL), VMWare workstation & the yoga DNS client (pointing at NexDNS).
And sure enough. It works.
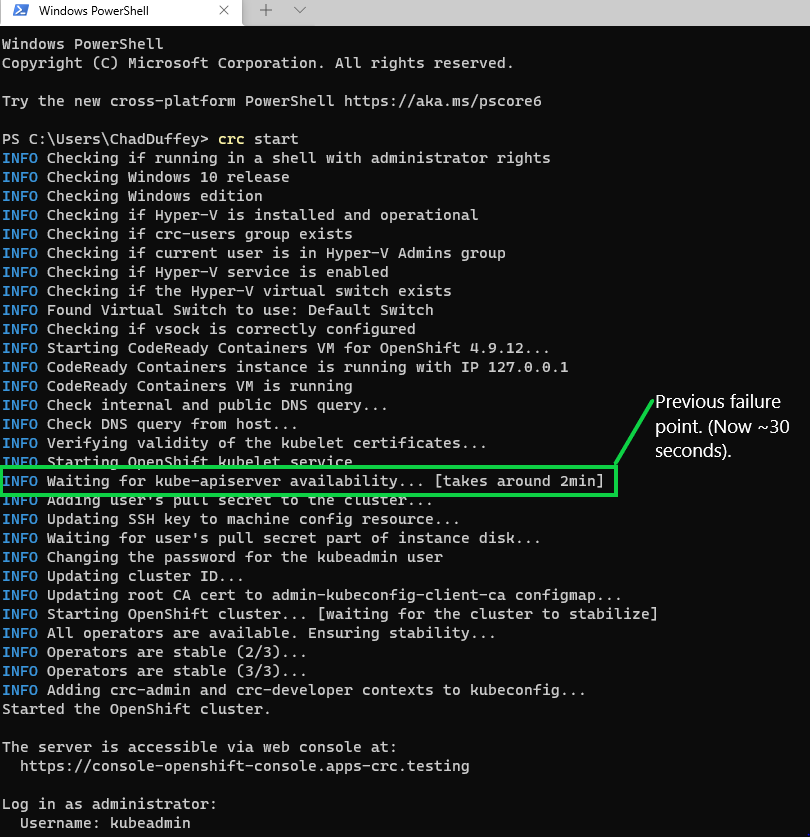
The lesson here was simply to ignore the failure message and give the VM about 10 minutes to initialize. The host still has a rotational disk in it which is probably most of the reason it is awful. Replacing with a SSD this week, will report back if the error simply goes away when the VM can start faster.
Update: I popped a new SSD in the host. The error was resolved and the whole “crc start” process took less than a quarter of the time.
- [5] run “crc stop” if you’re done with the environment. Remember it’s ephemeral though. You’ll lose anything you were messing about with in there.