vpn · wireguard
A practical personal VPN with Algo and WireGuard
Quick VPN endpoint all to yourself using your Azure (or AWS) subscription, based on the Trail of Bits Algo project. Algo creates the server and client profiles; WireGuard handles the tunnel.
The screenshots capture the 2020 deployment. Current Algo can set up its own Python environment when ./algo runs; the manual environment step below is for the older workflow. Current installation instructions.
Deploying Algo
If you are on Windows, using WSL generally makes the deployment process smoother.
- Make sure the Azure CLI or equivalent cloud CLI is installed and authenticated.
- Clone the Algo repository:
git clone https://github.com/trailofbits/algo.git
cd algo
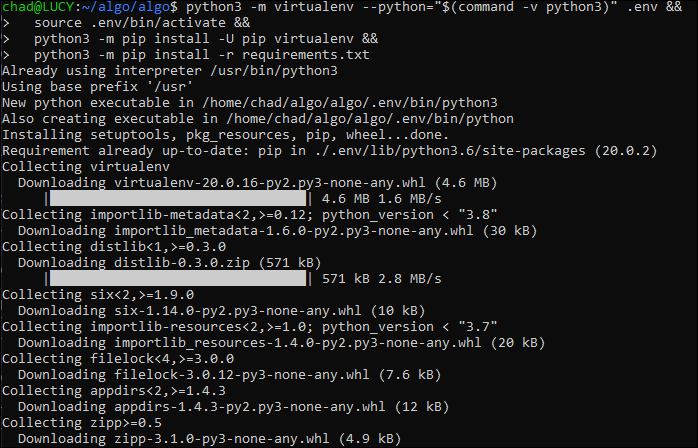
- In the Python-based setup used here, create an isolated environment and install the dependencies. This needs Python’s
venvsupport installed on the deployment machine:
python3 -m venv .env
source .env/bin/activate
python3 -m pip install -U pip
python3 -m pip install -r requirements.txt
- Edit
config.cfgto suit the deployment. Give each device its own entry in the users list so a lost phone doesn’t require replacing the laptop’s profile too. - Run the deployment wizard:
./algo
- Answer the provider and configuration questions.
When deployment succeeds, Algo writes the generated client material into the configs/ directory:
#                          Congratulations!                            #
#                     Your Algo server is running.                     #
#    Config files and certificates are in the ./configs/ directory.    #
#              Go to https://whoer.net/ after connecting               #
#        and ensure that all your traffic passes through the VPN.      #
After deployment, confirm the cloud security group or NSG exposes only the ports Algo requires.
Connecting from desktop clients
Install the WireGuard client for your operating system, then find the generated configuration for the client you created. In an Algo deployment, that is usually under a path like:
configs/<vpn-public-ip>/wireguard/
Import the matching .conf file into the WireGuard client and activate the tunnel.
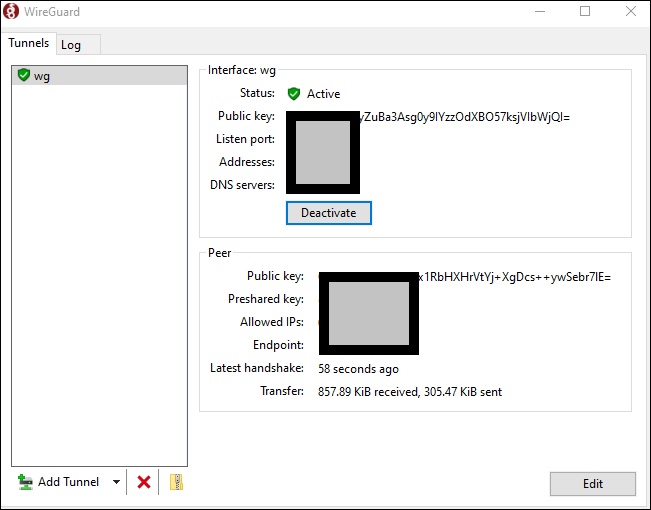
VPN configuration files are credentials. Anyone who has the config can authenticate as that client, so store them carefully and rotate them if they are exposed.
Connecting from Ubuntu
On Ubuntu, first check the current WireGuard installation guidance:
https://www.wireguard.com/install/
For many Ubuntu releases, installation is still straightforward:
sudo apt install wireguard
Copy the generated client configuration into /etc/wireguard. For example:
sudo install -m 600 -o root -g root ubuntu.conf /etc/wireguard/wg0.conf
Start the tunnel:
sudo systemctl start wg-quick@wg0
Confirm the service is running:
sudo systemctl status wg-quick@wg0
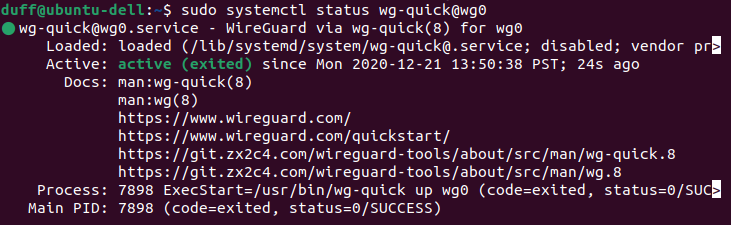
Confirm WireGuard has a live interface and peer:
sudo wg
Check the observed external IP address:
curl -4 https://icanhazip.com
That checks the IPv4 exit address, not every route. For a full tunnel, inspect AllowedIPs in the generated profile and check IPv6 and DNS separately. A recent handshake in sudo wg proves the peers exchanged traffic; it doesn’t prove the browser’s requests all used the tunnel. WireGuard’s quick start explains the peer and routing configuration.
If this client should connect after reboot, enable the service:
sudo systemctl enable wg-quick@wg0
Cleanup
When the VPN is no longer needed:
- Remove unused client configurations.
- Destroy the cloud VM and associated networking resources.
- Check for lingering public IPs, disks, NSGs, firewall rules, and DNS records.
- Remove any local copies of generated configs that are no longer needed.
Deleting the local client profile doesn’t revoke a copy someone else has. Remove that peer on the server as well, or replace the server if you’re finished with it.